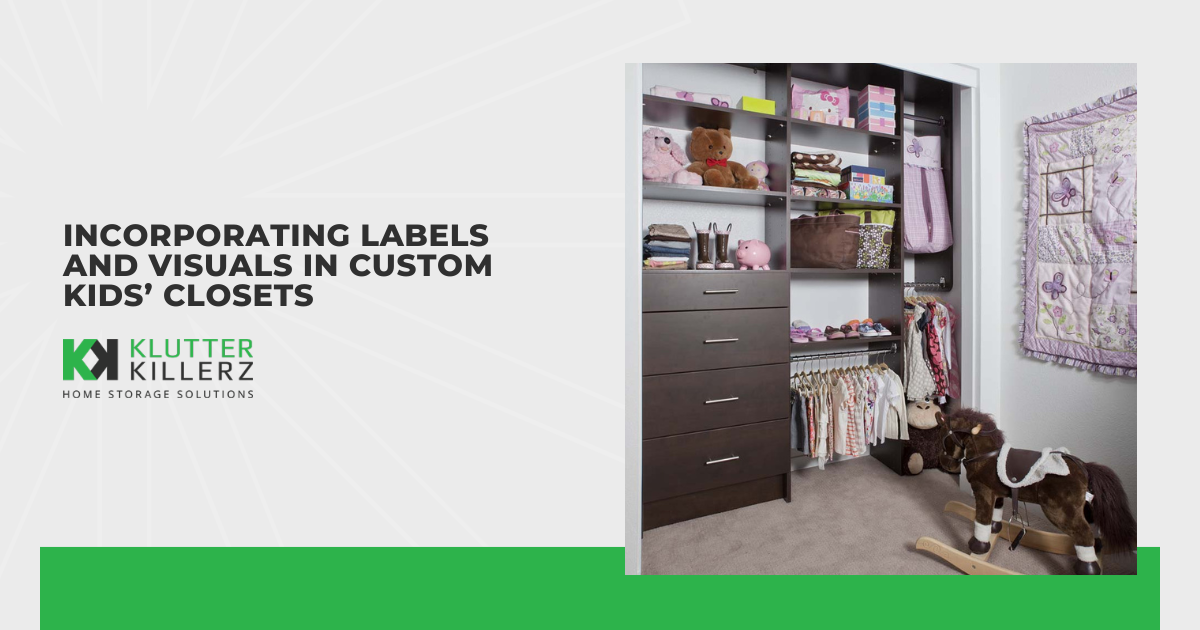
In my work with homeowners, I often run into the situation where a parent isn’t sure how to help their child’s closet stay organized. My team designs and installs effective and child-friendly kids’ closets that are created to appeal to children of all ages. When it comes down to the daily nitty-gritty of keeping those closets tidy, however, sometimes parents get frustrated. I’ve found that using labels and visuals is a great way to help keep order in closets for kids of all ages.
In this article, we’ll go over some of the best tips I have for using these items in kids’ closets:
- The benefits of using labels and visuals
- The different types of labels and visuals
- How to create effective labels
- Where and when to place the labels and visuals you choose
- Keeping these items maintained
At Klutter Killerz, my team thrives on addressing some of your most challenging organizational woes. Whether you struggle with your children’s closets, feel overwhelmed by an unruly garage, or simply need some help getting your own storage spaces in order, we can help.
If your main concern right now is getting your kids’ closets in good order, we’ve got you covered! Keep reading to learn more.
Benefits of Using Labels and Visuals
You might wonder what the advantages are to using labels and visuals in the first place. Here are some of the ways they can benefit your child and his or her closet:
- Super Simple Organization: Labels and visuals make it so much easier for kids to find and put away their belongings. Think about how nice it will be when your little one knows exactly where their socks, shirts, and toys go just by looking at a picture or a word. Even the littlest members of your family will be able to stay organized, regardless of whether they can read.
- Boosts Literacy and Categorization Skills: Labels aren’t just great for organization; they’re also great for learning. When you label your child’s closet with words and pictures, you’re sneaking in some learning moments. They start associating words with items, which is important for early literacy. Plus, sorting things into categories (like shirts, socks, or toys) helps develop their skills in categorizing items, which will be helpful in school.
- Encourages Independence and Responsibility: One of the best parts about using labels and visuals is how it encourages your kids to be more independent. When they know exactly where their items go, they can start taking control of their own space. Imagine your child’s pride in being able to put their clothes away because they know exactly where everything belongs. It’s a win-win situation – you get a tidy closet, and they can take pride in their accomplishment.
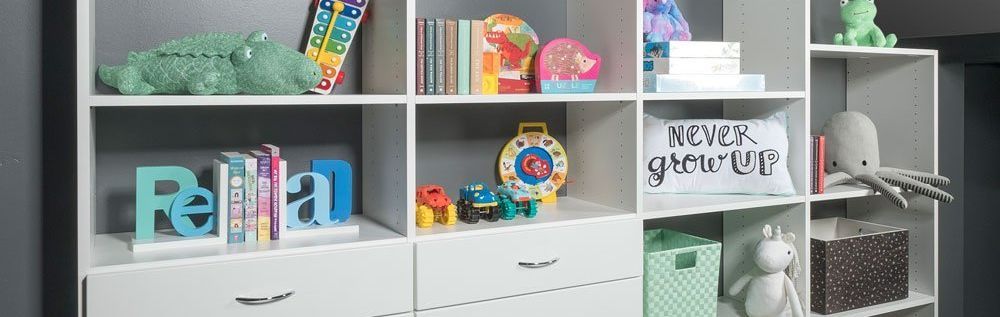
Types of Labels and Visuals
Sometimes, parents aren’t sure how to label items when their child is too young to read. The good news is that there are visuals appropriate for all stages of childhood – from toddlerhood to the teen years.
Text Labels
Text labels are straightforward and can be easily read by kids who know how to read. The idea is simple – label each drawer with its contents, like “socks” or “hair ties.” Early readers will start to recognize words, and older kids and teens won’t feel as though their closets are too babyish. Text labels are also classic and clean-looking.
Picture Labels
For younger children or those who aren’t reading yet, picture labels are a great choice. You can use photos, printed clip-art, or even hand-drawn pictures. For instance, use a picture or drawing of socks for the sock drawer or a toy car for the toy bin. Little ones who can’t read yet will be able to easily recognize where their items belong.
Color-Coded Labels
Color-coded labels add a splash of fun to organizing. Assign different colors to different types of items. For example, blue for shirts, red for pants, and yellow for toys. You can use colored stickers or labels to keep it vibrant and clear. Once kids know which color goes with which type of item, it will be easy to put their things away. You can make this more appealing by choosing their favorite colors.
Icons and Symbols
Using icons and symbols is another great visual method. Simple shapes like stars, hearts, or even different emojis or smiley faces related to the items can work wonders. For example, use a star for pajamas or a heart for favorite outfits. These are easy to understand for kids who aren’t reading yet. Even teens might get a kick out of using emojis or icons they consider ironic.
Creating Effective Labels
Here are some tips on actually creating the labels you’ll be using in your kids’ closets:
1. Choose the Right Materials
You’ll want to choose materials that are durable and that will stand up to use. At the same time, they should be easy to switch out as your child’s wardrobe changes due to the seasons, their preferences, or their age.
- Laminated Paper: Laminated paper is durable and should last quite a while. You can print out labels and laminate them, and they’ll withstand little hands rummaging through the closet.
- Adhesive Vinyl: These are great for sticking directly onto drawers, bins, or shelves. They’re smooth and durable, and you can just wipe them down as needed.
- Chalkboard Labels: These add a fun, interactive element. Use chalk or chalk markers to write and easily update the labels as needed. Kids who are learning to write often love these.
2. Use Clear, Legible Fonts and Bright Colors
To keep the closet looking good and the labels easy to see and read, go for clear, legible fonts and bright, attractive colors.
- Fonts: Choose simple, sans-serif fonts that are easy to read. Avoid overly decorative fonts, small fonts, or those in cursive that might be hard for kids to recognize.
- Colors: Bright, bold colors can help grab attention. Use contrasting colors for text and background for better visibility. Use your child’s favorite colors when you can.
3. Involve Kids in the Label-Making Process
Getting your kids involved in making the labels can significantly boost their interest and cooperation.
- Choice of Materials: Let them pick the materials and colors they like.
- Creating Labels: Have them draw pictures, choose icons, or help you write the labels.
- Placement: Allow them to decide where the labels should go to give them a sense of ownership.
Placing Labels and Visuals
Once you have your labels created, it’s time to decide where to put them in the closet. Here are some of my best tips and tricks:
Eye-Level Placement
The golden rule for placing labels and visuals is to keep them at your child’s eye level. It will help catch their attention and will also look nicer, overall.
- Why It’s Important: Labels at eye level are accessible and more likely to be seen. Your child won’t be having to look up or crouch down to see the labels.
- How to Do It: Measure your child's height and place labels and visuals where they can easily see them. Be ready to move the labels up over time as your child grows.
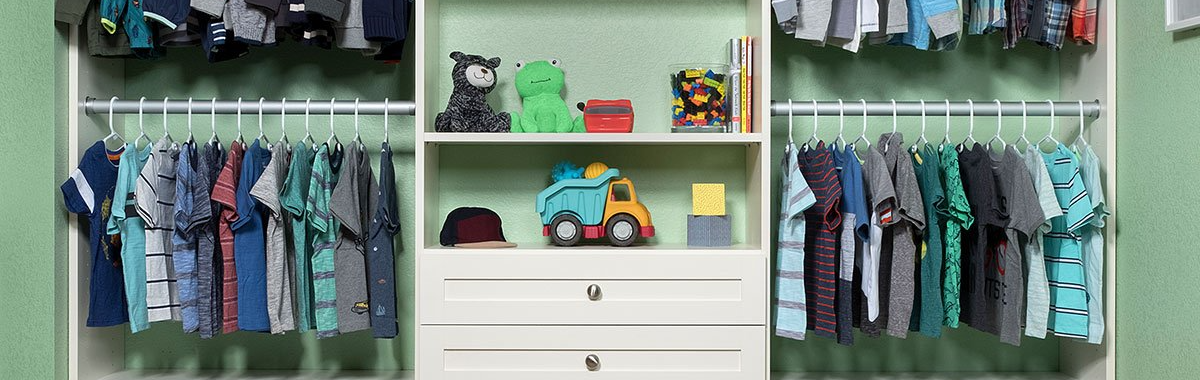
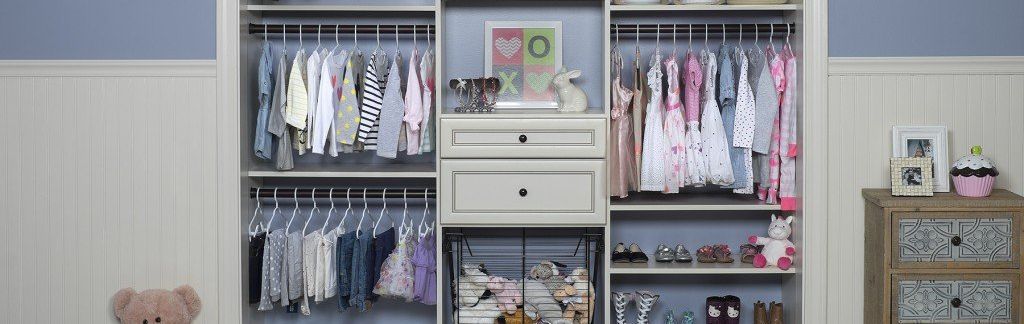
Categorizing and Grouping Items
Good labeling makes it easy to categorize and group items. This makes it easier for kids to know where everything belongs.
- Categories: Group similar items together, such as shirts, pants, toys, and shoes.
- Subcategories: For larger categories, consider subcategories. For example, within toys, you might have bins for action figures, dolls, and Legos. If you have a drawer of hair accessories, you might want to separate them into clips, hair bands, and ties.
Consistent Placement
Consistency is crucial when it comes to labeling. Using a predictable system helps children remember where things go.
- Same Type, Same Place: Place labels for similar items in the same spot on each drawer, shelf, or bin. For example, always place clothing labels on the top left corner of drawers.
- Uniform Style: Keep the style and format of labels consistent. This includes using the same font, color scheme, and size. This will help the closet look nicer.
Maintaining and Updating Labels and Visuals
Once you have your labels or visuals in place, you’ll want to make sure they continue to look and function well over time. Here are some tips on doing just that:
- Regularly Check and Update Labels: Set a regular schedule, like the start of a new season or the new school year, to update labels. Adjust them as needed to reflect what’s being stored in each of the bins, drawers, or shelves.
- Clean and Maintain the Labels: For laminated or vinyl labels, you can just wipe them down with a damp cloth. Chalkboard labels can be refreshed with a new layer of chalk paint or chalk marker. If a label is damaged, have extras available, so you can replace it.
Making Updates Fun
Sometimes you’ll need to update the labels or the closet itself. This can feel stressful to a child who has gotten used to a certain way of doing things, but you can involve them and make it fun.
- Let Them Help: Your kids can draw new pictures, pick new colors, or help you write new labels.
- Make It a Game: Turn updating labels into a scavenger hunt or a matching game. For example, match the new labels with the items, or find items that need new labels.
- Celebrate Changes: Use updating sessions as a chance to celebrate growth and change. For example, “Look how much you’ve grown! Time to update your closet for your new clothes.” The Cleaning Authority has a lot more ideas on making all types of cleaning, including closet cleaning, fun.
Conclusion
Using labels and visuals is a great way to transform your child’s messy closet into a well-organized, functional, and appealing space. You’ll both benefit from smoother daily routines, and your child will love being more independent. If you’re struggling with closet organization as a whole, please give my team a call. We have professional designers who are ready to help you take control of your child's closet. Best of all, your consultation is free!